
Delete & Restore
To delete individual file(s) within an item and restore them, you can:
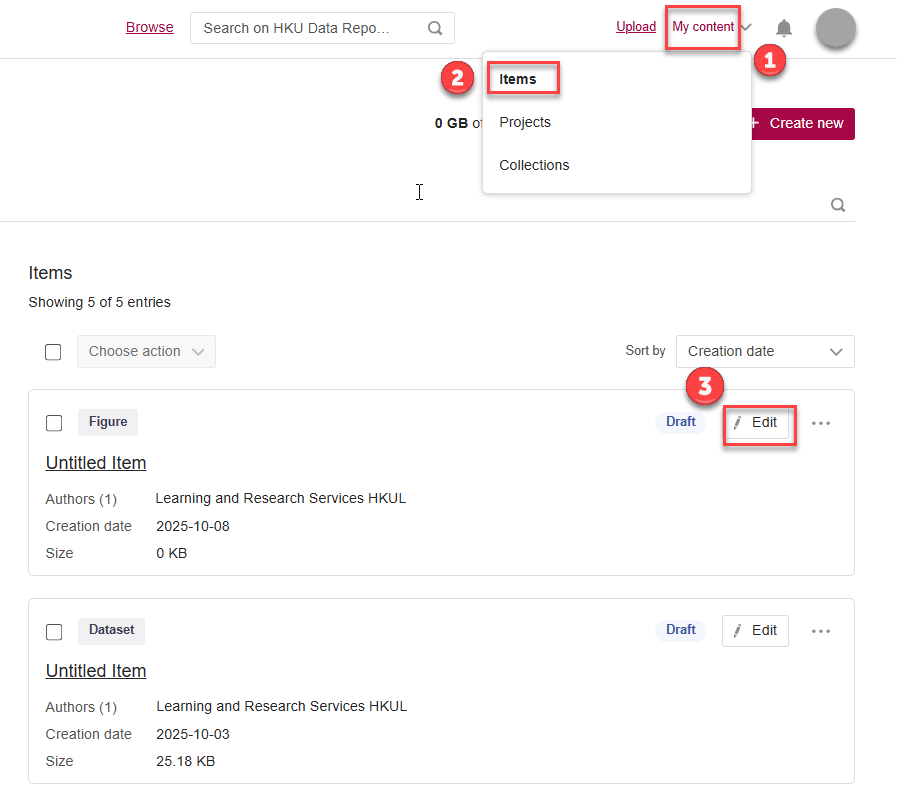
1. Click on the “My content > Items”, then click on the "Edit" icon at the right side of the record to access the dataset item record editing page.
2. Select "Manage files" in the data file uploading box.

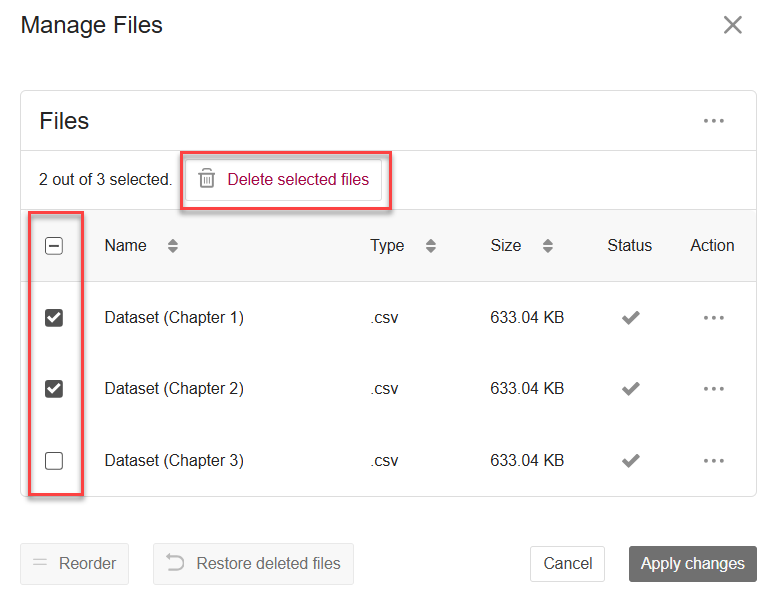
3. Now you can manage all the individual files uploaded under the same item record. To delete records, tick the box beside the file/folder name, then click on "Delete selected file(s)".
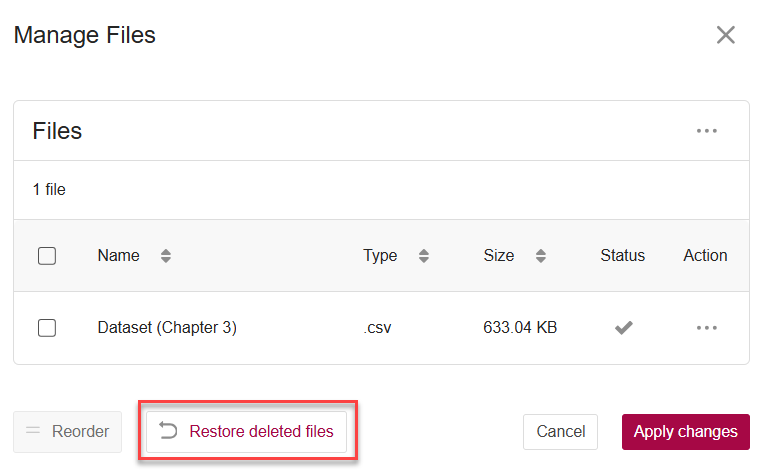
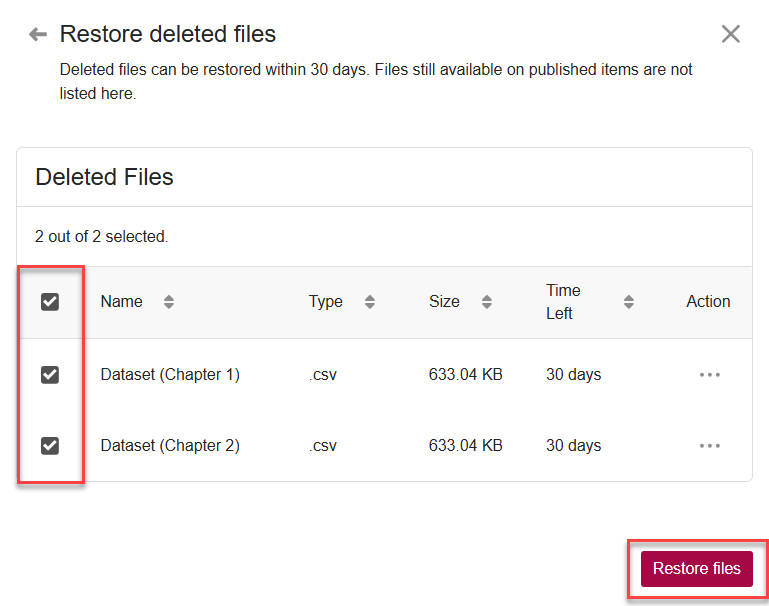
4. If you would like to restore the files that were deleted before, return to the data uploading box and click on “Restore deleted files”.
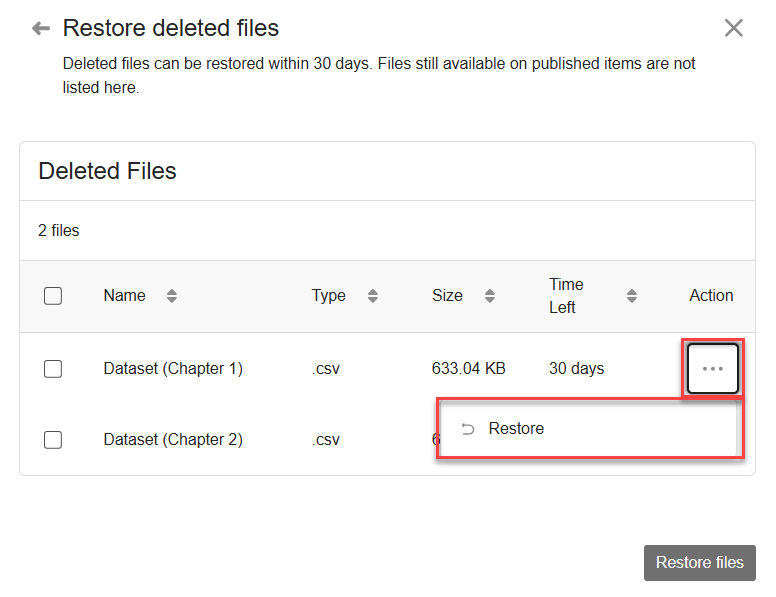
5. You will find a list of deleted files shown. Simply 1) click on the "loop arrow" icon for restoring a single file/folder, or 2) tick the box beside the file/folder name, and then click on "Restore file(s)".
Please note that deleted files can only be restored within 30 days after it is deleted. Remaining days available for restoration of each file/folder will be shown beside the loop arrow icon.
Request for Extra Storage
If you need extra storage spaces for your research data, please follow the below steps for submitting the request:
1. Login and go to “My Content > Items” page.
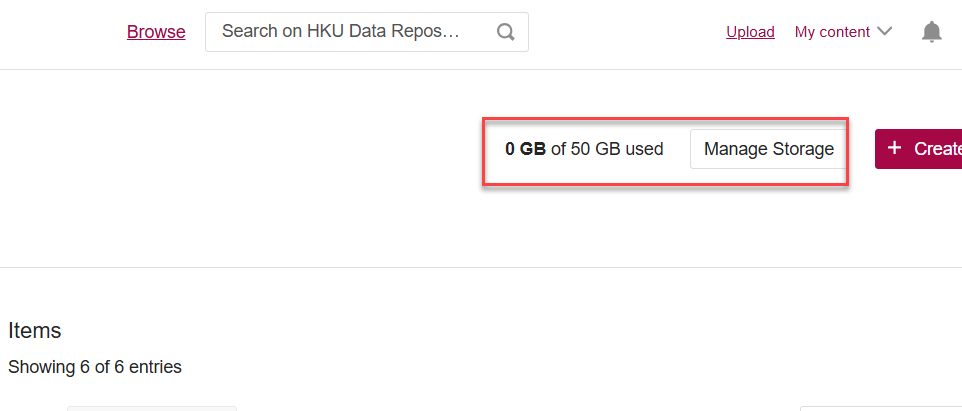
2. Find your storage and click on “Manage Storage”.
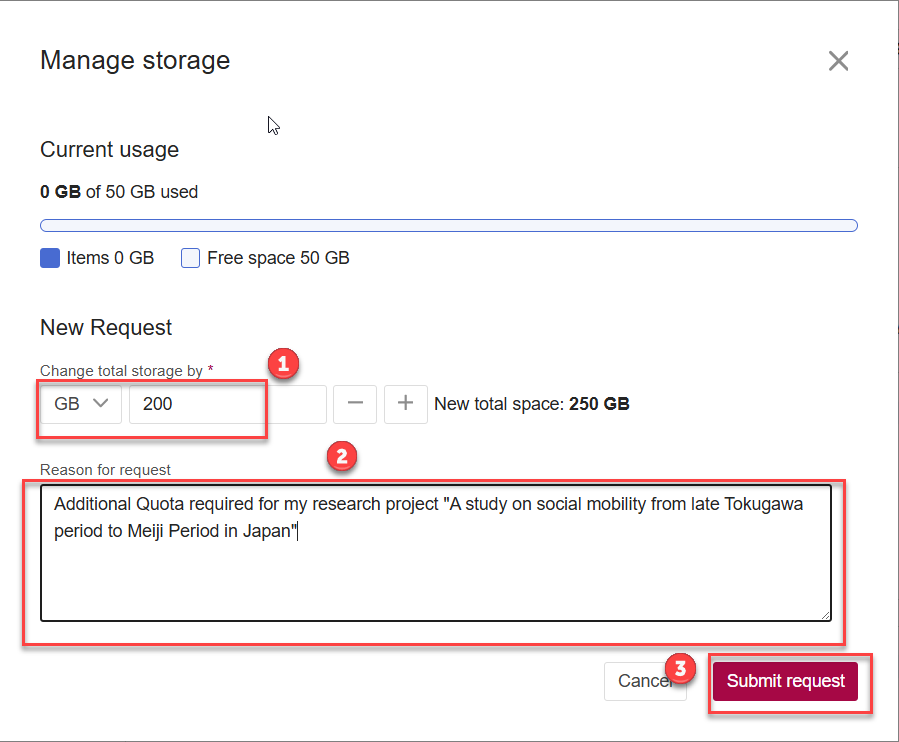
3. Fill in the details of your request:
- The desired extra storage volume (selection of data storage unit available)
- Reasons for the request
Click on “Submit” to officially submit your request.
Citing dataset in your published research serves the same purpose of citing journal articles or other types of publications: attributing credits to the producers or providers of the dataset and allowing other researchers to track the sources and reuse the data, which would enable the reproducibility of your findings.
Include the followings when you are citing a dataset:
Unfortunately, standard of data citation has no agreed unified format and may vary across disciplines. Yet, on DataHub, you may choose from a dropdown menu on which citation style you would like to use when citing the data. The below steps will show you how to get the citation:
1. Go to the published item page and click on the “Cite” button.

2. Select the citation style you wish to use. DataCite has been set as default.

You may also export the citation to RefWorks, BibTeX, Endnote, DataCite, NLM, DC and Ref. Manager. These could be found on the right bottom of the dataset record page.

