Publish Items
1. When the whole dataset item record is ready to publish, press the “Submit for review” button on the right side of the editing page.

If any mandatory field(s) is incomplete, a prompt message will appear and you are unable to submit it until all the required field(s) are filled.

If you have not uploaded any files but did not select “Set as metadata record” in the data uploading box, an error message will be prompted asking you to either upload a file or choose "set as metadata record".

2. If everything is fine, a message box will be prompted asking for your confirmation to proceed with the submission.

3. Once you have clicked on “Submit for review” again, your data and the item record will be sent to our reviewers for checking. When it has been done, your published data and files will be publicly viewable.
Note: For Research Postgraduate (RPg) students, there are additional steps required for the publishing process.
Please refer to the section “Submission Guide" for Research Postgraduate students.
Publishing a new version of your published item
1. Uploaded files and metadata records could be edited even if they are published. The item record can be found under “My data” and indicated by a green dot symbol under the status column.

2. Move your cursor to the right of the record and click on the grey pencil icon.

3. The item record page will appear and you may edit the field(s), add or delete any file(s) in the record. Updating major metadata & elements of the item such as title, authors and uploaded files will lead to a new version with a versioned DOI. Please read this full list of elements that would trigger a new version for reference.
If changes were made to the mentioned fields, the message “The changes you've made will create a new version” will appear above the “Save changes” button. When you have finished the updates, press on “Submit for review” for publishing.

4. The revised version of the item will be under review again and checked by our reviewers. Once it is approved, the newer version will go public and the version number will be indicated on the metadata record. You may also view the older version(s) by selecting it on the drop down menu.

5. Updating other field(s) such as categories, item type, keywords, and description will not trigger a new version. You can simply proceed to click on “Submit for review” for publishing. Any changes submitted will also be sent to our reviewers for checking.
Restricted Access
There are occasions that you may wish to upload your data with access control conditions, especially for the sensitive data that conveys personal identifiers. The below will guide you through the steps required for setting up access restrictions to your files.
If your data contain sensitive, confidential or restricted data per the HKU Policy on Research Ethics, you are required to handle those data by means of either of the below two methods:
Upload the data under restricted access
Make and upload a version that anonymizes the data, for public access (with the approval of relevant IRBs or ethics committees)
Please refer to the below sections when you would like to set up access restrictions to your files:
Applying embargo period
First of all, click on the "Add embargo and restricted access" on the right side of the dataset record editing page.

A embargo setting box will be prompted and you are required to select the settings in three parts: I. embargo period, II. embargo type, and III. who can access during the embargo period.
I. Embargo Period - How long will the access restrictions apply
You will have to decide how long will your selected access restrictions be applied to your files or the entire content.
1. Permanent
If you would like to make your restrictions in effect forever, select “Permanent Embargo” under Embargo period.

Note: Please note that applying “permanent embargo” onto “the entire content” with “nobody” can be accessed (type D under Who can access) is not allowed.
2. Specified period
You may also choose to restrict access only for a certain period. However, once the embargo period ends, your data files or the entire content will automatically be made publicly available. In other words, all of your selected restricted access conditions will no longer be effective after the end of the embargo period.
You are recommended to select this option if your dataset is only temporarily unavailable to be published for a certain period owing to reasons such as journal publication policies.
To specify the embargo period, either select the preset period from the dropdown list on the left or select a specific date of expiry from the calendar on the right under Embargo period.


When the item is published with an embargo period with an expiry date at file level, a countdown will be shown on top of the metadata page of your item and files are temporarily restricted from previewing and downloading by those who haven't been granted access. The files will later become available for Open Access once the embargo period has ended.

II. Embargo Type - How much content will be set under restricted access
You may decide if your chosen level of access restrictions would be applied 1) on your uploaded files only or 2) on the entire content.
1. On files only
Choosing “on files only” means your selected access restriction rules will only be applied to your uploaded files, while the metadata record of your dataset will remain publicly available.
Click on “On files only” from the dropdown menu under Embargo type.

2. On the entire content
If you would like to apply your access restrictions “on the entire content”, it means both of your uploaded files and the metadata record of your dataset will be available to only those you have granted access to.
Click on “On the entire content” from the dropdown menu under Embargo type.

Note 1: Under this setting, the entire metadata record of your dataset together with your files will not be shown on DataHub to those you haven’t granted access to.
Note 2: If you are restricting access to particular parties (type A, B or C under Who can access) on “the entire content”, DOI is unable to be generated due to insufficient metadata available. Instead, a HANDLE will be assigned to your item.

III. Who can access during the embargo period
There are four levels or types of restriction available when you are deciding who can access your data uploaded on DataHub:
A. Only to anyone who has connected to the HKU network
During the embargo period, access is restricted to anyone who has his/her device(s) connected to the HKU network (e.g. WiFi) on campus, or anyone who has connected to the HKU VPN outside the campus.
Slide to “Custom” under Who can access the embargoed content?. Turn on "Users within a specific IP range". Tick the box “University of Hong Kong”

Note: Do not select this option (type A) together with type B and C as it will loosen the level of the restrictive conditions specified in type B and C.
B. Only to logged in HKU members
During the embargo period, access is restricted to HKU members, including both academic staff and RPg students, who have logged in with their HKU portal ID on DataHub.
Slide to “Custom” under Who can access the embargoed content?. Turn on "Logged in users of". Tick the box “HKU Data Repository”.

C. Only to selected group(s) of HKU faculty staff members
During the embargo period, access is restricted to selected group(s) of HKU faculty staff members who have logged in with their HKU portal ID on DataHub only, e.g. staff members of the Li Ka Shing Faculty of Medicine. Multiple group selection is also available.
Slide to “Custom” under Who can access the embargoed content?. Turn on "Logged in users of". Tick the box “Select groups”. Click on the pull down menu on the right and select the group(s) of HKU faculty staff members who you would like to grant access to.

Note 1: It is unable to only grant access permission to individual staff member(s) from a faculty.
Note 2: Do NOT select “Research Postgraduate” unless you would like to grant access to all of the current RPg students at HKU.
D. Nobody could access your files or metadata record
During the embargo period, access is restricted to only yourself and no one could access your data files or metadata.
Under Who can access the embargoed content?, leave the option “Nobody” as your currently selected option.

Note: For RPg student research dataset submission, dataset under this setting (type D) will be accessible only to the student, and his/her supervisor(s). The examiner(s) of thesis may also request access to the data for thesis examination process (MPH15 & PHD15 of the Procedures). When the student and supervisor(s) leave the university, the Dean of the faculty will be granted access permission.
Reasons for embargo
Before saving all of your embargo period settings, you are strongly recommended to also include your reason(s) for applying restricted access conditions at the files level in the comment box. Once all the settings are complete, click on "Save and close" to save it and return to the dataset record editing page.

Linked Files
If your data is already retained in an external repository, you may wish to create an item record with the link directing others to where your data is stored.
Instead of browsing or dragging any files, click the “Link to external files” button in the data uploading box. Copy and paste the link into the text box.
Note: This option is available only if you have not uploaded any files to the item.

If you would like to edit the link, you are required to remove it completely by clicking the cross symbol (Remove field) and add a new one.

The link will be shown on top of the published metadata page as shown below. You can refer to an example of a linked file item.

Metadata Record Only
If your data are forbidden to be uploaded onto another repository owing to copyright issues, or the data are considered to be too sensitive to be uploaded (with valid justification), you may wish to create a metadata record only.
Without any file(s) being uploaded, select the “Set as metadata record” option in the data uploading box. Fill in the reason(s) for creating a metadata record only. Provide the access information if data are preserved in an external repository.

Once the item is published, the metadata record page will be publicly available with no file to be shown. You can refer to an example of a metadata record.

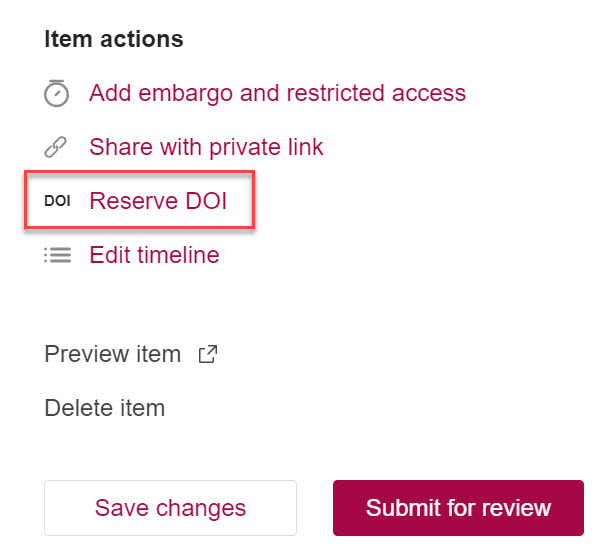
Reserving DOI
By publishing your research on DataHub, a DataCite DOI will be automatically allocated, which will enable your data to be cited using different citation methods.
However, if your data are not ready to be published yet, you may also reserve a DOI during the uploading process. It will only be active and citable when the item is published.
Click on “Reserve DOI” at the right side of the item details page.
A DOI will then be generated immediately. It will be shown in a prompted box. Press on the "Copy DOI" button to copy the reserved DOI for future use, then close it.

The DOI information will be available on the right side of your screen. You may "disable DOI" only if the item is private and not yet published. Please note that the activated DOI cannot be disabled once the item has been published.

 Service Counter
 WhatsApp: 5441-5441
 Research Consultation (HKU academic staff and postgraduate students only)